Guest post: Conor Nolan
by thisnorthernboy

This is the second of my guest blog posts, and my guest author today is Conor Nolan. I’ll quote Conor’s bio from his website, as it’s definitely worth a read.
Conor Nolan’s first memory was getting a paper cut after drawing an amorphous blob meant to be a sumo wrestler. Two and a half decades later he’s still drawing, though practice has reduced risk of injury. After graduating from Pratt Institute in 2012, Conor gradually found his footing in the world of illustration. Since then he has worked with a variety of clients, from VICE to Dark Horse Comics to Dungeons & Dragons, and has had his work appear on posters, shirts, card and board games, beer labeling, record covers, magazines, newspapers and a battery of other platforms. Conor lives in Rhode Island with his dog, where they break up time at the drawing desk with nature walks and well deserved coffee breaks.
You can find more of his work on his web site, Twitter, and Instagram. You should definitely check out Conor’s store too.
Now, over to Conor…
Imagine a book of maps. Each page shows a different place, with a multitude of paths leading to a multitude of destinations. Within each path there are beginnings, twists and turns, and eventually, an end. The journeys shown on one page may not resemble the next, but in embarking on each, there are certain consistencies implied: the use of a compass, a continual pressing forward, and the buzzing excitement of seeing your final destination on the horizon. This book, and the myriad journeys within it, looks a lot like my process. Rarely does the path to a final piece share the same route as the last, but all share certain commonalities of exploration, persistence, and fulfilment. Let’s start at the beginning of one such journey, and follow it to its destination.
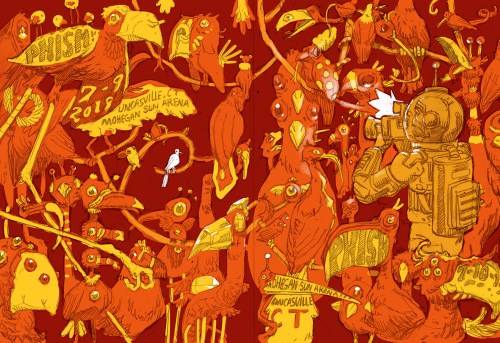
In early February 2019 I was asked to supply the artwork for a concert poster. The band was Phish, and they’d be playing two shows in July back to back. Inspired by the show structure, it was decided that the poster should be a diptych, with one poster representing each show, and the two coming together to create a single unified artwork. The final art was due in late May, allowing enough time between art delivery and the show for printing. Phish has an avid fan base, and has supported an ongoing legacy with their concert posters, with past artists including Jim Pollock, David Welker, Chuck Sperry, and Ken Taylor, amongst many others—so I was looking forward to being a part of that tradition.
The guidelines for the project were set. The posters would be screen-printed (giving me 3-5 colors to work with) and the dimensions were 16 x 22”. 800 of each night would be printed, and then delivered to my studio where I’d sign them. The subject matter of the art was generally up to my discretion, however it was advised to stay away from fish, skulls and anything too morbid or macabre.
My first step was to start putting ideas down on paper. It was important to me to create an image that would work across both posters, but still feel singular if someone could only afford one of the two. I started to thumbnail possible directions to hash out ideas. These thumbnails are rarely legible to anyone but myself, but excepting this blog post, usually no one but me sees them!


Once I’ve selected the strongest concepts from the pile, I draw out more coherent sketches with additional details and clarifications added. The majority of sketches that I use for professional work don’t include color, but I felt that the limited palette available to me with screen-printing made it wise to consider color earlier in the process than usual.
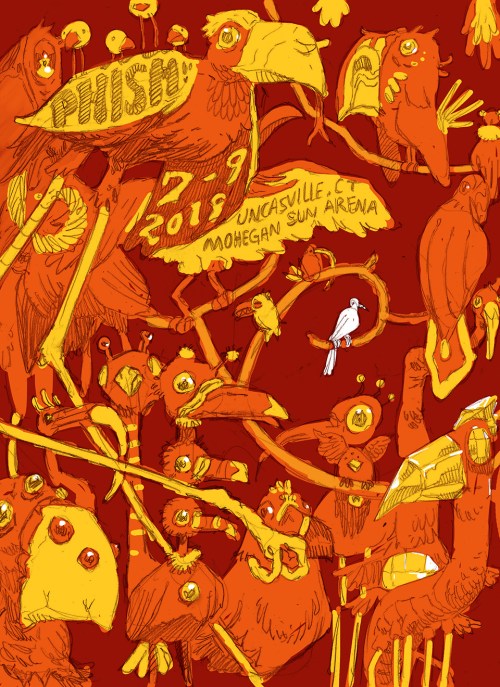
I submitted the following three sketches, and a short description for each, to the client for review.


The art director for the project reacted positively to these sketches, but suggested there might be room to push things further. Fortunately, there was room in the budget and schedule to allow for this, so she keenly asked for an additional sketch, which I happily submitted.
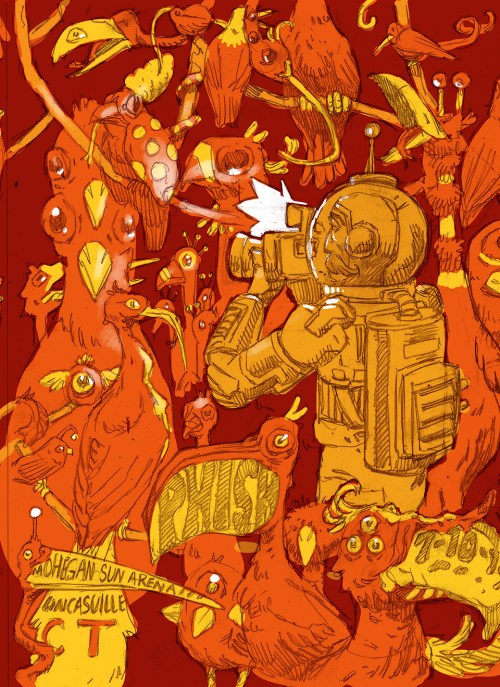
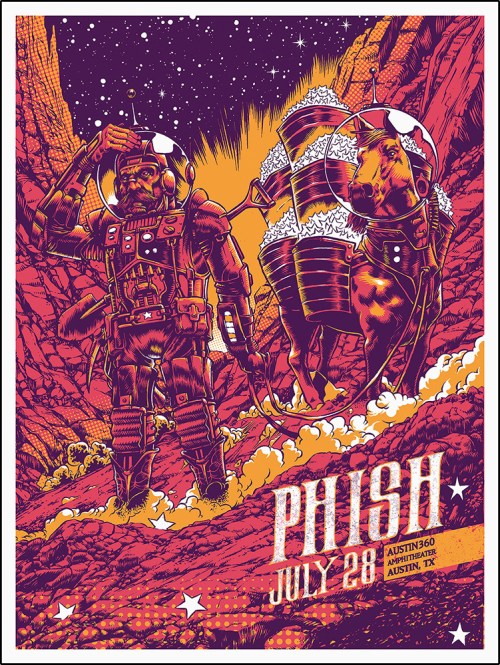
This concept was a continuation of a narrative that I created in 2015 for my first concert poster for Phish. In that poster, I showed an intergalactic cowboy and his spacesuit-clad horse mining fallen stars from the surface of an alien planet. For this new sketch, the same cowboy was still prospecting a far away world, but this time, he was birdwatching, and taking in the local fauna. One bird in particular is highlighted, with the cowboy’s binoculars fixed on its location. The art director selected it as the sketch to move forward.
My next step was to develop a rock solid drawing. Many years back, I was lucky enough to see a talk by Kali Ciesemier at The Society of Illustrators in New York, where something she said really stuck with me: that the key to a good illustration is a good drawing. As obvious as it seems now, what resonated with me about this advice was the realization that it never pays to be lazy when drawing, especially at the beginning. Consider the eraser your friend! If something doesn’t look right, get rid of it and start anew.

Keeping this lesson in mind, I tend to draw on Bristol paper when working through my drawings, as it can really take a beating with an eraser and not show it too much. Bristol paper is sold by a lot of different brands, at all different price points, but in my experience, the variation in quality between options is minimal. I didn’t have a sheet big enough to match the final size, so I taped two pieces of 12.25 x 15.5” Bristol together, making the entire canvas 25.5 x 15.5”. My preference is always to draw slightly smaller than printing size, as it saves me time when working through an elaborate drawing.
I almost always use Bic mechanical pencils when I draw. I buy them at the supermarket in bulk right after “Back to School” season and everything is on sale—$10 gets me a year’s supply. Their points are consistently and remarkably sharp, which makes them very conducive to detail-oriented work. I also find their erasers to be far sturdier than those on the typical pencil. The main downside to Bic mechanical pencils is that I’m certainly not helping the environment by using a disposable plastic pencil! My 2020 resolution is to invest in more permanent and durable mechanical pencil that I can continually refill.

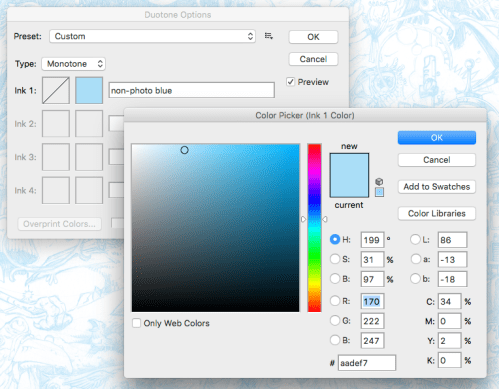
After the drawing is complete, I scan it with my HP Officejet 7610. It’s both a scanner and decent printer, and has been a reliable workhorse of mine since I bought it in 2012. Since the drawing is smaller than print size, I scan it in at 600dpi. I use my Wacom Intuos Pro tablet to clean problem areas in Photoshop; anything from proportional irregularities to eraser lines to typographic placement is fair game. When I’m happy with the drawing, I change its Color Mode from grayscale to duotone. The duotone color I use is a non-photo blue, for reasons I’ll outline a bit later on. Instructions for this step below:


After this I divided the drawing in half, and printed both halves on separate 11 x 17” pieces of Bristol paper. These two prints are pieced together with archival tape on the backside, revealing the full non-photo blue print of the drawing, and also the start of the inking phase.

Illustrator Henry Pitz wrote in his 1957 book Ink Drawing Techniques that “no medium reveals its deepest secrets except to those who love it”—a feeling that couldn’t resonate more with me. To me, drawing is the battle, and inking is reaping the spoils of war. I find a quality of expression in inking that is unsurpassed. It’s my favorite stage of the whole process, one that I find calms my mind and leaves me oddly meditative.
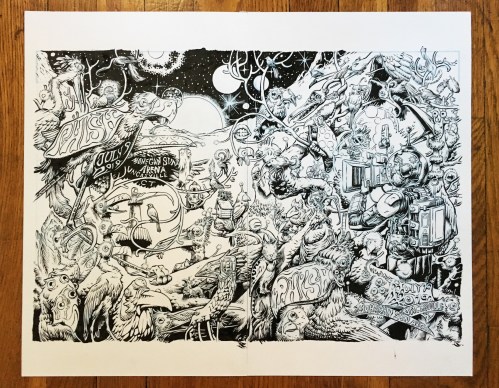
For these posters, the inking process took me about two and a half days of work. I prefer small brushes for the same reasons I work with mechanical pencils—they can get into tight corners and allow for a lot of detail-orientation and precision. When I ink something large like this, I tend to work in a rotating fashion, starting in a corner, inking a good chunk, and then spinning the paper around to work on another corner. The main purpose of this is to let the ink dry. It’s not uncommon for me to put my hand on wet ink, smudging a segment of the drawing, and rotating the canvas prevents that chance. Another concern I watch out for is prevents natural oils from getting on the paper. These natural oils will show up as fingerprints or palm prints in blacked out areas. It’s a small thing, but I try to prevent it to keep the illustration as pure and high contrast as possible.
Once the inking is completed, I scan it into my computer on grayscale mode at 600 dpi. This mode doesn’t pick up the non-photo blue and therefore the ink drawing is left isolated. The ink drawing is enlarged to print size, and coloring commences. With the amount of adjacent projects I had on the table, I chose to hire a colorist friend of mine, Meg Casey, to color flat the drawing: a process that includes blocking out the main shapes, coloring book style, within the drawing so that shading and color can be applied. Fortunately there was room in the budget for me to hire Meg, and it saved me a ton of time to work on other projects. When I received the flats back, they looked great.
https://www.behance.net/megcasey
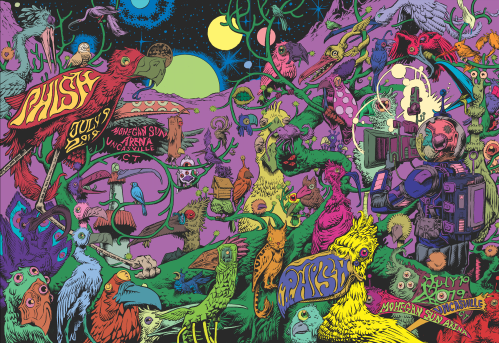
Finally, it was time to figure out coloring. The original sketch was a warm palette, with red, orange, and yellow, plus the white of the paper. After living with this combination for a couple days, I decided to reassess: I found it to be a bit of a strain on my eyes, and too close to my 2015 Phish poster palette as well. I wanted to mellow it down without sacrificing the psychedelic vibe that was achieved by three analogous hues. Intuition told me that a purple oriented palette was the right way to go, but it took me a few tries to get there. Remember, only 3-5 colors could be used since this would be screen printed.
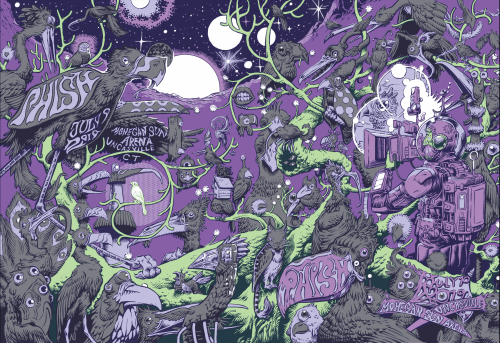


The approved end result was 5 layers. The colors spanned from the deep, dark purple of the line work, to a sky blue that cuts through the purple like lightning.
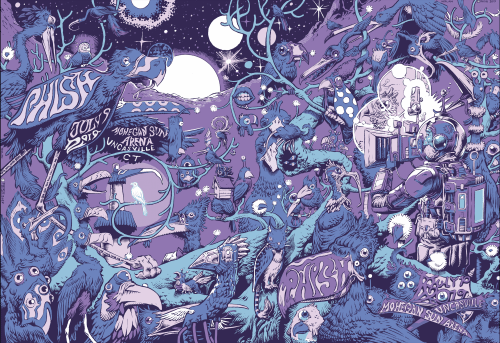

Here’s how the isolated color palette looks.

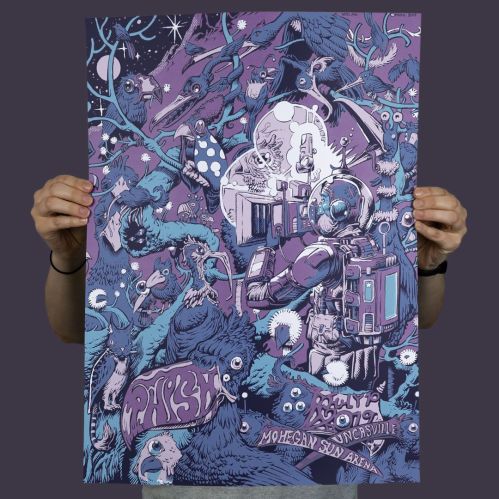
With the illustration completed, thus started a back and forth conversation with the very patient Half and Half printing. They received the final print file, and executed the necessary tweaks to get it ready for screen-printing before starting the process. A couple weeks later, the prints arrived, and the quality blew me away. Hats off to the wonderful people at Half and Half. They did impeccable work and I hope to collaborate with them again in the future.
http://thehalfandhalf.com/printing/
The second to last step was to sign all of the posters. Vanity aside, this was no easy task with 1600 prints! Signing took me another three days, followed by packing the prints up again for transport. Luckily, the venue of the show was only an hours drive from my studio, so I was able to hand deliver the posters myself.
So: one journey ends and many more await. Hopefully you enjoyed the ride, and gained some insight along the way. My process is personal and imperfect at times, but over my career I’ve learned to trust my instinct and do what works for me. Should you have any questions about any of these steps or my work, feel free to reach out at nolanillustration@gmail.com.
Thanks to Rob for letting me take up valuable real estate on his blog. He’s a great artist, and a wonderful person.
You can follow my work here:
Instagram: https://www.instagram.com/nolanillustration/
Twitter: https://twitter.com/conor_draws
Website: www.conornolan.com
•
Massive thanks to Conor for putting this post together for me to publish, I think he did an incredible job – of both the poster and the blog post. Conor’s work really is stunning, and he’s definitely an artist whose work I look out for on social media. Brilliant and inspirational. Do check out his links.
Thanks again Conor.

looks really nice.
Really great artworks!
Really glad you liked the post. Conor’s work is fab.
This was so educational! The color choices, all the steps help out so much to people learning, like me :p