this northern boy

Illustrations for an imaginary age

Category: Guest Post

Guest post: Alex Connolly

This is the fourth guest post on this blog, and it’s the most unexpected. Previous guest posts have generally been about the quest author’s work – art, process, methods etc. That’s what I was expecting when I asked Alex to write me something. In an unnecessary show of modesty, Alex decided to not write about himself or his work, but of something much deeper. It’s very good. And you should definitely read his post below, but first, as Alex is too modest, I’ll sing his praises here.

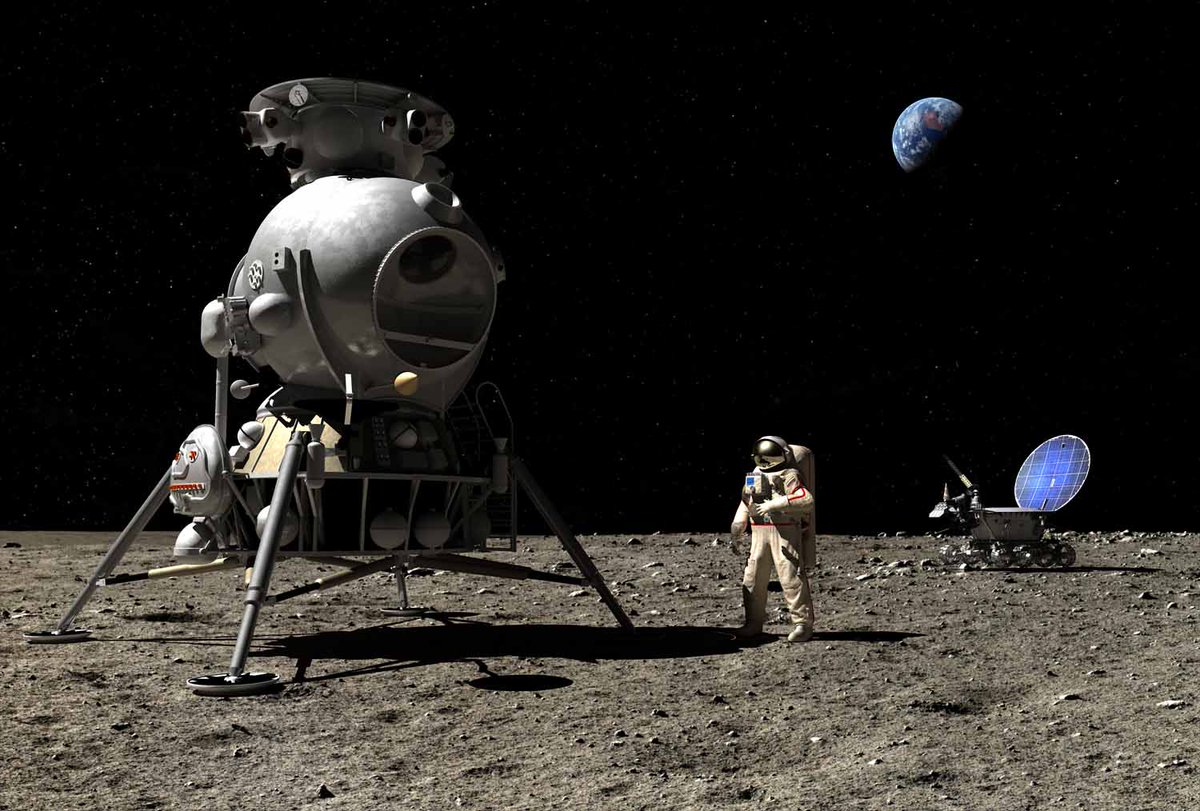
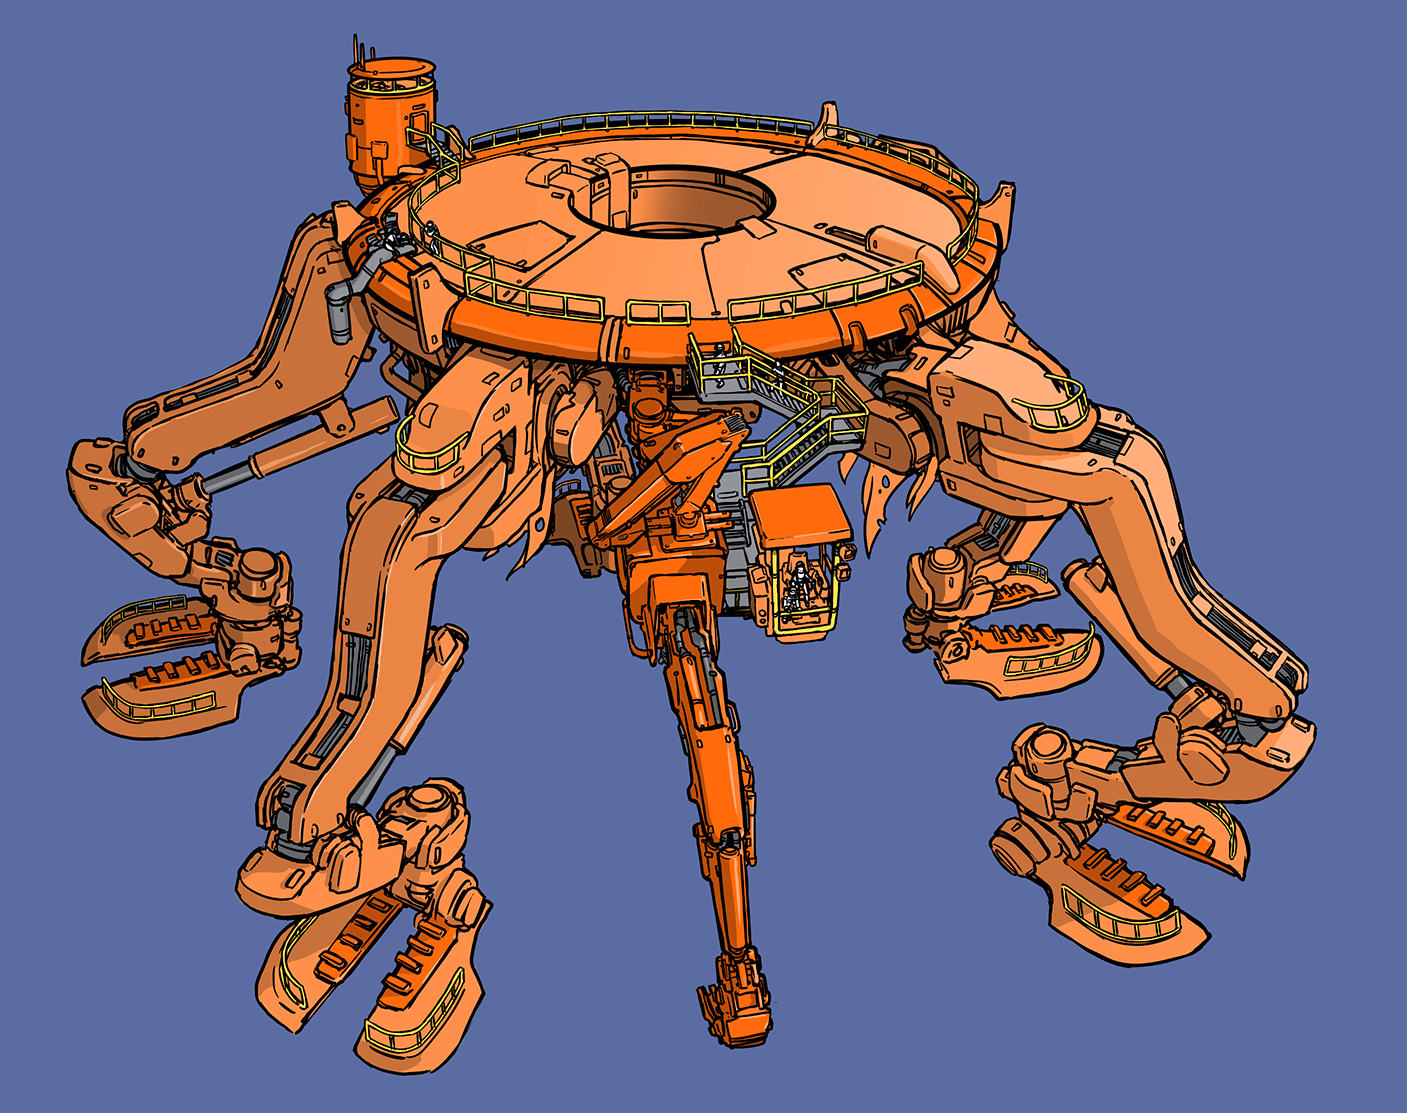
Alex Connolly is an Australian designer and illustrator, living in southern Japan. He’s worked for Neill Blomkamp (director of District 9, Elysium and Chappie), Marvel (I don’t need to add anything here do I?) and Double Damage Games. I first saw his personal work and was blown away. Alex produces incredibly technical mechanical sci fi illustrations. Incredibly designed, but perfectly believable. Check out Alex’s work on his website and twitter.

And now, for Alex…

Ember in the Palm

First of all, I want to thank Rob for the opportunity to write for his esteemed blog.

Our creative agency, while not exclusive to, would be a lot different if it weren’t for the strange and dexterous marvels known as the human hand. No sooner free from the constraints of quadrupedalism, our ancient forebears took to all manner of evolutionary endeavours. Fast forward beyond the adaptive wonders of our Homo habilis ‘Handy Man’ origins, and we arrive not just at the mechanical deftness of our closer relatives, but breakthroughs in creative cognition. 

In three parts, I want to select particular moments in the history of visual communication that celebrate the hand as a creative constant through time. These are not necessarily definitive, more personal picks from a smorgasbord of creative pursuits as we tumble through time. 

The first part deals in the very definition of a touchstone. 

Turning Point I – Wonderwall

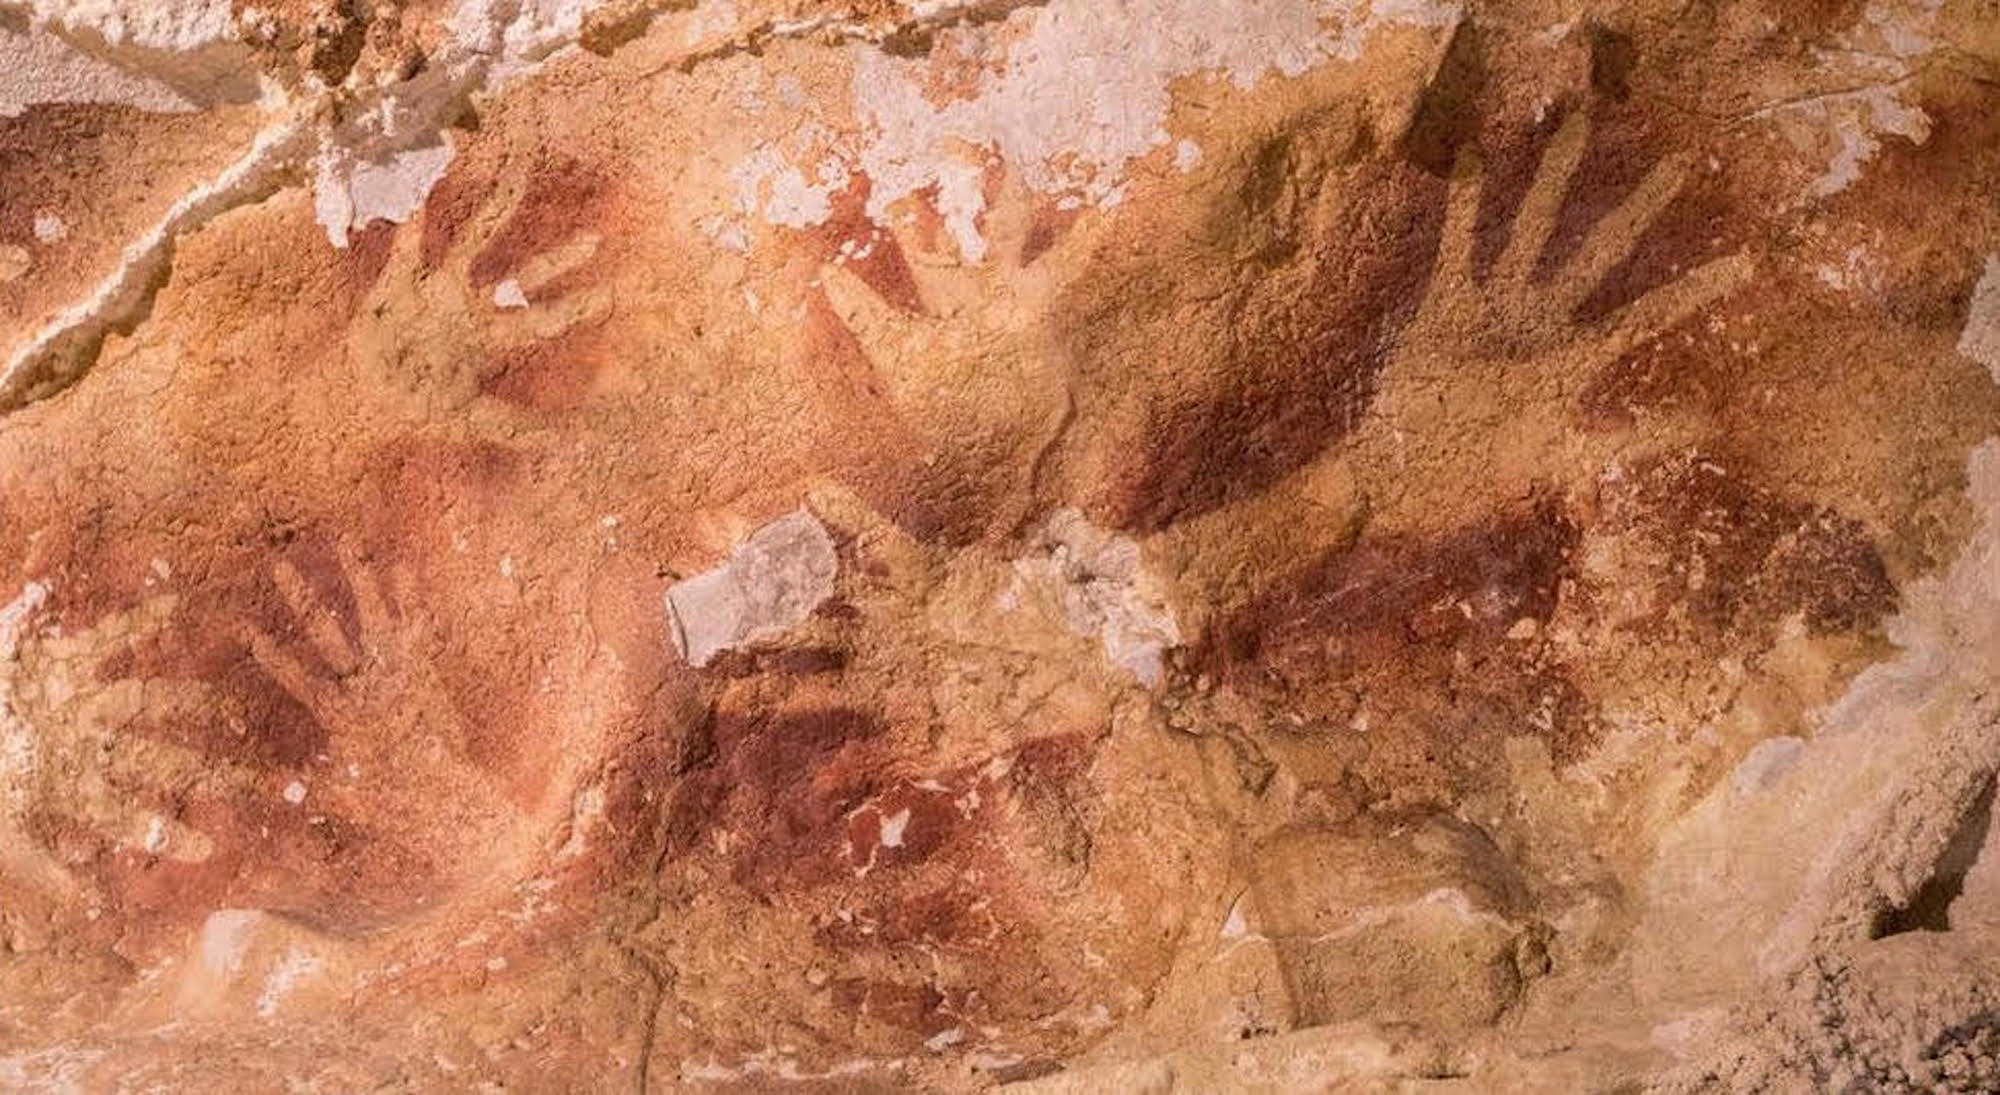
Parietal art or ‘rock art’ can be traced almost 40,000 years into prehistory. It is a strong visual demarcation that helps to define our ancestors as not just reactive wanderers, but as possessing an intrinsic creative drive to reflect and record. Naturally, given our physiology and biological perspective, it stands to reason hands feature as some of the oldest rock art in existence. These are our most practical tools; our dexterous and articulated arguably as important as the brains that operate them. 

As such, the oldest rock art currently recorded are hand prints. Two particular locations featuring these antediluvian artworks are the El Castillo cave paintings in Spain and on the Indonesian island of Sulawesi, dated to 39,000 BCE and 37,900 BCE respectively. There has been some speculation as to which species of early human was first to be artistically inclined for its own sake. Conjecture has yet to prove whether Neanderthals committed to stone art in the same way as Homo sapiens, but it is understood that the latter were responsible for both El Castillo and the Liang Timpuseng artworks. 

Both locations were used by early humans as shelters for generations, featuring an array of figurative and symbolic artwork across hundreds, perhaps even thousands of years. Hand art, a form dominated by negative space, has the artist — a shaman or perhaps a leader — place their palm against the rock face and spray ochre or some other form of intentionally-selected stain via their mouth or through a hollowed bone or reed. Theories as to meaning suggest anything from ritual to merely an act of self-actualisation, from ownership to leadership. 

In the end, all share intent. Marking a moment in time in communal space, iconography that is not merely acknowledged by the artist’s contemporaries, but by generations thereafter. Ancestors such as Australopithecus garhi and Homo habilis are often associated by their primitive tool creation and usage, but said usage was largely survival-oriented. In the case of parietal art, it speaks to complex preparation such as the gathering and production of medium, and the conscious capacity to undertake an act that does not directly translate to survival. 

Often perceived as the bare minimum of creative expression, the synaptic leap that could afford such action remains profound. Considering we are the recipients of this moment in time, it elicits what German philosopher Rudolf Otto called the numinous; an arousal of spiritual emotion or an overwhelming sense of awe.

While cave art soon came to showcase cognitive development of the visual cortex, in the ability to render wildlife or spiritual conceits, the state of modern visual communication arguably started with the outline of a hand.

In the next section, I want to share development of another aspect of visual communication; one that took the hand itself as a canvas, creating an ancient artform that crossed cultures and class.

Turning Point II – Shrubs in the Desert

Before hands were pressed to walls in ancient grottos, Neanderthal tribes inhabiting the Iberian Peninsula were known to practice the art of self-beautification, a breakthrough in symbolic-thinking that predated the arrival of Homo sapiens in Europe by 10,000 years. 

This concurrent development in consciousness is evidenced by the discovery of discarded shells containing trace elements of foreign pigments. In essence, crude palettes within which to mix lepidocrocite, haematite, pyrite, and charcoal for the purpose of crafting body paints. Studies suggest that a driving factor for this paradigm was social pressure, as Neanderthal tribes began to condense in lower Europe, and eventually amplified by the arrival of Homo sapiens. Therefore, survival required an intensification of visual impact. This was, in essence, a primeval social mantle atop a Darwinian core, as groups encountered each other and vied for best first impression. It can be argued that little has changed.

Make-up has been a staple of self-expression ever since Humankind’s cousin started mixing hues, expressed throughout history as a signifier of wealth and importance. Egyptian pharaohs associated beauty with spirituality, leading to a ritualisation of cosmetics. Certain minerals such as Malachite and Galena gave the distinctive aqua-green and black tones of Ancient Egyptian eyeliner, with the production thereof being prohibitive and exclusionary. 

Such exclusion has meant that visual communication and its development was often the providence of aristocracy. Monied strands of society who, by merit of position and patronage, inferred artistic appreciation as an upper class pursuit. But not all visual art is beyond the means of the underclass, and in the case of henna, can appeal to and be practiced by all levels of society.

Made from the rugged Lawsonia inermis that flourishes in arid climates, Henna has been used in beautification since the Bronze Age. A powder is ground from the leaves of this resilient plant, then mixed with liquid such as lime juice or tea. After resting, it is applied to the hands, feet or hair, where the now-freed Lawsone molecule binds with keratin, leaving behind a robust, rusty red that lasts for weeks. 

The plant’s abundance, and relative ease of preparation, meant that time was the only prerequisite to usage. 

Henna usage has been recorded from North Africa, throughout the Middle East, to the Sub-Continent and as far as the Malay Peninsula. As impressive as geographical spread is the cosmetic’s sheer universality in the societies who used it. The Hery Sesheta embalmers used henna to decorate nails prior to mummification in Ancient Egypt, and Cleopatra herself used it both in body decoration and in hair dyes. The North African Tuareg and Amazigh tribes took to using henna to adorn their hands with the same ornate patterns they wove into their Ehan tents. Practitioners of all regional faiths found henna an excellent way to bypass texts that forbade permanent tattooing, or frowned upon adornments such as jewelry that could conceivably convey idolatry. 

It was brought into Persia through the Rashidun Caliphate’s westward conquest beginning in 633 AD, and while indigenous usage on the Sub-Continent was speculated to have started earlier, the later Mughal invasion of India in the 16th Century cemented it as a social norm. Contrary to association, the country was one of the last places to take up this art form.

Henna design variation naturally between region and culture. From Mali’s fish bone style to the aforementioned angular geometry of the Algerian nomads, from the ‘dipped fingertips’ of the Hebrews and Copts to patterns produced by string guidelines across Persia; each hand possessed intricate and highly meaningful adornment, reflecting the culture within which the owner existed.

More importantly, this was across the entire socio-economic spectrum. From the poorest castes to the richest nobles, henna was a cultural constant. Mummified remains of peasantry in Ancient Egypt, their rudimentary interment a far cry from the careful preservation of deceased nobility, still exhibited henna pigment on their scarified remains. 

Requiring a level of symbolic interpretation, and aside from practical creations like weaving, henna’s prevalence is visual communication that existed against prohibitive conditions like literacy and status. This highly personal beautification of one’s own hands remains unlike most artistic pursuits in the ancient and medieval worlds at that time. 

In the next and final post, I want to present a critical moment, where the physical and the virtual collide to leave an indelible mark on creative culture.

Turning Point III – Futureworld

It was seen as a dancing band of light displayed on the curved display of a cathode-ray tube, signal voltages rendered in visual form. Ben Laposky’s oscilloscope arrived in 1950, offering the first rudimentary glimpse at a simulated visual future, even if a byproduct of test machinery. 

Twenty-two years later, in a graduate program at the University of Utah, Fred Parke and Edwin Catmull carried what Laposky had started to then-unimagined levels. All it took to leave an indelible mark on visual communication was an industrial-grade research computer and Catmull’s left hand. 

At the time, Catmull was undertaking a research task not in the field of art, but science. It specifically related to the difficulty of rendering and animating curved surfaces on the hardware of the day. This processor-intensive computation favoured simple geometric patterns where vector coordinates could be rendered in relation to each other with comparative ease. As a technical challenge, the human hand was selected to map, compute and animate, as it required the problem of simultaneous movement to be solved. Moreover, rendered not just as rudimentary vectors, but via a technique called texture mapping to give definition and dimension to the model. 

The two made a plaster cast of Catmull’s hand, then set about charting the contures of the model into a series of triangles. Three hundred and fifty interlocking triangles were then measured in relationship to each other using a computerised drafting tool that logged coordinates in three-dimensions, which in turn slowly replicated the cast within a custom CAD program Catmull had coded.

Once all the information was transferred to the computer, so began a case of manipulating vertices in a simulated three-dimensional space, and ensuring that neighbouring sections acted accordingly to realistically portray articulation. Texture-wrapping was then applied over the wireframe, which accounted for light sources and calculated shadowing. It was a new form of sculpture, a simulacrum of the organic in an electronic landscape. And while the painstaking minute-long animation occurred clumsily frame by frame via off-screen photography, this digital hand was a crucial jumping-off point for computer graphics and animation. 

The ramifications for rendering figurative complexity within a synthetic space would cause ripples beyond calculating and testing engineering theories; one minute’s worth of hand-waving would set the imaginations of artists on fire. Without it, genre-defining authors like William Gibson may not have conjured their ideas about virtual reality in quite the same way, if at all. CG may not have come of age in cinema quite so quickly, had Catmull and Parke been satisfied with the crude cylinders and quadrilaterals of the era. This was a watershed moment, in every one of its three-hundred and fifty interconnected pieces.

From the spattered negative space on rock walls to the philosophies behind Univers, visual communication has been a constant but ever-evolving way for humankind to relay their ideas through shape and colour. Environmental and extraneous contact points throughout history supercharged our capacity to render, reflect and record our ideations of the world, with an intent to instill or share them with others. 

Cognitive development in the visual cortex, alongside increasing social elements, suggested that early humans put as much intent into parietal art as the Henna artists of the ancient and medieval worlds. Henna art itself a broad concept that traveled the trade routes, or found contemporaneous usage on account of the plant’s ubiquity. By the time the artform had arrived in the Indian subcontinent, it had spread far and wide, and was used to convey its own myriad stories.

And while it started as a painfully rudimentary process, the mitochondria of Parke and Catmull’s painstaking work exists within each and every 3D project; from Hollywood effects to a kid teaching themselves Blender.

That inherent creative drive, however it bears out, is something to be treasured and cherished. Particularly as visual artists, where the uncanny and ineffable conversation between brain and hand presents itself as an artistic communication, Otto’s numinous is never far away.

Even when the blank page is a burden, or our creative batteries feel flat, therein remains the powerful original spark, one that was pressed against a rockface at the dawn of time. 

Huge thanks to Alex for this fascinating and unexpected guest post. That last sentence will stay with me for a long time. Once again, do have a look at Alex’s website and follow him on Twitter.

You can find prints of my work here

I also have a Patreon page

And you can find more of my work online…
Twitter
Instagram

Mastodon
Gumroad
Facebook

Tumblr

Buy Me a Coffee at ko-fi.com

Guest post: Alastair Temple

This is the second of my guest blog posts, and my guest author today is Alastair Temple.

From Alastair’s website –

Alastair is a professional engineer who has been known to dabble in Digital Art and Photography. He is a founding member and administrator of the international art collective The Luminarium. Alastair has worked with a number of clients worldwide ranging from bands and artists such as Delta Mainline and Jonathan Kreisberg to publishers such as HarperCollins. Alastair is from Scotland and is currently based in Malmö, Sweden.

You can find more of Alastair’s work on:
Instagram
Facebook
Twitter
Behance

Enough of me, over to Alastair.

This blog post has taken me quite a long time to write (we are coming up for about 10 months now), partly because I am very good at putting things off and partly because I really wasn’t sure what to write about. When I initially put myself forward for doing this I had suggested that I put together a walkthrough for my piece Going Home, but the more I thought about it, the more it seemed relatively uninteresting (for those that do want it, I have included a quick overview at the end).

Going Home

It was only after making a more recent piece, my Lighthugger illustration, and how well received it was that I thought of something which will hopefully be more interesting. I realised what I had done well in these pieces, and it is consistent if you look back through my portfolio (for example my first ‘successful’ scifi piece The Guardians has similar features) it is that I hide the lack of details, and hint at them rather than showing them.

Lighthugger

This is even clearer when we look at some of the actual models for example those of the jump gate/portal from Going Home. To put it simply I am not a very good modeller, and I can’t paint, so I have needed to come up with some strategies to hide these facts while I slowly improve them. It is these that I will share with you today, and hopefully they will help someone else out there as well.

The Guardians

Model close/ups (lighting and textures removed):

Model Close Up
Model Close Up

Strategy Number 1 – Scale is your friend
The first and simplest way to reduce the detail needed is to make use of large scale scenes. When things are a long distance from the observer, you simply can’t see as much. For example in Going Home I didn’t need to worry about if the windows looked real or the structure made sense because you can’t see it. Scale allows you to think about general proportions of the object and how it fits into your composition while not having to worry about all the little details that make an object look real when close up.

Strategy Number 2 – Utilising Lighting.
The second strategy is to use lighting to hide or obscure areas and therefore minimise the detailing required. Here backlighting (or side lighting) is your friend. These types of lighting are dramatic to start with which is a definite bonus, but also they highlight the overall shapes of your objects, the shape of any key components and to use textures to hint at smaller details. If we take for example my Lighthugger piece, the use of backlighting, and the nebula behind the ship allows me to define the conical shape of the ship, highlight the two outboard ‘conjoiner drives’ and the ice shield on the front. I can use textures/displacement maps to hint at panelling and other details on the rest of the ship as well as adding some lights to give an impression of windows/exhaust vents/hangar bays etc, without having to worry about if the actual details make any sense. If we take the same model and piece, and reverse the lighting so it is front lit, then you can quickly see it looks like the simple model it is and there aren’t any real details to speak of.

Lighthugger – final with backlighting
Lighthugger – lit from front

Strategy Number 3 – Use Assets (by others and yourself)
This is a fairly simple and straightforward point. You don’t have to create everything from scratch for every piece. In all of the pieces I have talked about today I have re-used things I created for other projects, I have kitbashed from my own assets and kitbash packs (there are a lot of good free ones out there if you don’t have the budget to pay), I have used textures made by others and I have used generative programs to create things in ways I would not be able to myself.

For example in The Guardians we have:

  • The large structure I created in Mandulbulb3D, just messing with parameters until I had something I liked.
  • The lens flare was created by my friend Bobby Myers for me to use for the project.

In Going Home:

  • The ship was kitbashed,
  • The planets were both created using Video Co-pilots orb plugin (and the base texture for the gas giant was an acrylic paint texture by Julian Frener).
  • The engine lens flare is from a pack I bought a while back.

In Lighthugger:

  • The ship utilises textures by Travis Davies and some created in JSPlacement.
  • The background nebula is created through a number of fractals made in Apophysis.

So I guess what I am saying is, don’t let your lack of skills in certain technical aspects stop you. Work on them definitely, but in the meantime, minimise their impact on your final piece by starting simple. Concentrate on getting the composition, colours and feel right and try and do a little more each time!

That walkthrough overview for those who are interested:

  1. Model jump-gate in favoured 3D software (I used Cinema4D, but 3DsMax, Blender or any other could easily achieve the same results). 
  2. Model or kitbash a spaceship design also in 3D. Include both in the same model so they are lit the same, but render separately to ease composition later.
  3. Make 2 planets, I utilised Video co-pilot’s Orb plugin for After Effects for this and utilised an acrylic paint texture for the gas planet.
  4. Composite in photoshop (note for a central composition like this, you want everything to be almost, but not quite symmetrical).
  5. Add lighting effects, lens flares etc and do final colour corrections. 
  6. Save and upload.

Huge thanks to Alastair for putting this blog post together. As someone who is just starting to learn 3D there’s a lot of great advice here. Hope you’ve enjoyed reading this as much as I have. Do check out Alastair’s links, website and social media.

Guest post: Conor Nolan

24_FinalResult

This is the second of my guest blog posts, and my guest author today is Conor Nolan. I’ll quote Conor’s bio from his website, as it’s definitely worth a read.

Conor Nolan’s first memory was getting a paper cut after drawing an amorphous blob meant to be a sumo wrestler. Two and a half decades later he’s still drawing, though practice has reduced risk of injury. After graduating from Pratt Institute in 2012, Conor gradually found his footing in the world of illustration. Since then he has worked with a variety of clients, from VICE to Dark Horse Comics to Dungeons & Dragons, and has had his work appear on posters, shirts, card and board games, beer labeling, record covers, magazines, newspapers and a battery of other platforms. Conor lives in Rhode Island with his dog, where they break up time at the drawing desk with nature walks and well deserved coffee breaks.

You can find more of his work on his web site, Twitter, and Instagram. You should definitely check out Conor’s store too.

Now, over to Conor…

Imagine a book of maps. Each page shows a different place, with a multitude of paths leading to a multitude of destinations. Within each path there are beginnings, twists and turns, and eventually, an end. The journeys shown on one page may not resemble the next, but in embarking on each, there are certain consistencies implied: the use of a compass, a continual pressing forward, and the buzzing excitement of seeing your final destination on the horizon. This book, and the myriad journeys within it, looks a lot like my process. Rarely does the path to a final piece share the same route as the last, but all share certain commonalities of exploration, persistence, and fulfilment. Let’s start at the beginning of one such journey, and follow it to its destination.

In early February 2019 I was asked to supply the artwork for a concert poster. The band was Phish, and they’d be playing two shows in July back to back. Inspired by the show structure, it was decided that the poster should be a diptych, with one poster representing each show, and the two coming together to create a single unified artwork. The final art was due in late May, allowing enough time between art delivery and the show for printing. Phish has an avid fan base, and has supported an ongoing legacy with their concert posters, with past artists including Jim Pollock, David Welker, Chuck Sperry, and Ken Taylor, amongst many others—so I was looking forward to being a part of that tradition.

The guidelines for the project were set. The posters would be screen-printed (giving me 3-5 colors to work with) and the dimensions were 16 x 22”. 800 of each night would be printed, and then delivered to my studio where I’d sign them. The subject matter of the art was generally up to my discretion, however it was advised to stay away from fish, skulls and anything too morbid or macabre.

My first step was to start putting ideas down on paper. It was important to me to create an image that would work across both posters, but still feel singular if someone could only afford one of the two. I started to thumbnail possible directions to hash out ideas. These thumbnails are rarely legible to anyone but myself, but excepting this blog post, usually no one but me sees them!

Once I’ve selected the strongest concepts from the pile, I draw out more coherent sketches with additional details and clarifications added. The majority of sketches that I use for professional work don’t include color, but I felt that the limited palette available to me with screen-printing made it wise to consider color earlier in the process than usual.

I submitted the following three sketches, and a short description for each, to the client for review.


The art director for the project reacted positively to these sketches, but suggested there might be room to push things further. Fortunately, there was room in the budget and schedule to allow for this, so she keenly asked for an additional sketch, which I happily submitted. 

9_Sketch710_Sketch811_Sketch9

This concept was a continuation of a narrative that I created in 2015 for my first concert poster for Phish. In that poster, I showed an intergalactic cowboy and his spacesuit-clad horse mining fallen stars from the surface of an alien planet. For this new sketch, the same cowboy was still prospecting a far away world, but this time, he was birdwatching, and taking in the local fauna. One bird in particular is highlighted, with the cowboy’s binoculars fixed on its location. The art director selected it as the sketch to move forward.

12_2015Poster

My next step was to develop a rock solid drawing. Many years back, I was lucky enough to see a talk by Kali Ciesemier at The Society of Illustrators in New York, where something she said really stuck with me: that the key to a good illustration is a good drawing. As obvious as it seems now, what resonated with me about this advice was the realization that it never pays to be lazy when drawing, especially at the beginning. Consider the eraser your friend! If something doesn’t look right, get rid of it and start anew. 

13_FullDrawing

Keeping this lesson in mind, I tend to draw on Bristol paper when working through my drawings, as it can really take a beating with an eraser and not show it too much. Bristol paper is sold by a lot of different brands, at all different price points, but in my experience, the variation in quality between options is minimal. I didn’t have a sheet big enough to match the final size, so I taped two pieces of 12.25 x 15.5” Bristol together, making the entire canvas 25.5 x 15.5”. My preference is always to draw slightly smaller than printing size, as it saves me time when working through an elaborate drawing. 

I almost always use Bic mechanical pencils when I draw. I buy them at the supermarket in bulk right after “Back to School” season and everything is on sale—$10 gets me a year’s supply. Their points are consistently and remarkably sharp, which makes them very conducive to detail-oriented work. I also find their erasers to be far sturdier than those on the typical pencil. The main downside to Bic mechanical pencils is that I’m certainly not helping the environment by using a disposable plastic pencil! My 2020 resolution is to invest in more permanent and durable mechanical pencil that I can continually refill. 

14_BicPencils

After the drawing is complete, I scan it with my HP Officejet 7610. It’s both a scanner and decent printer, and has been a reliable workhorse of mine since I bought it in 2012. Since the drawing is smaller than print size, I scan it in at 600dpi. I use my Wacom Intuos Pro tablet to clean problem areas in Photoshop; anything from proportional irregularities to eraser lines to typographic placement is fair game. When I’m happy with the drawing, I change its Color Mode from grayscale to duotone. The duotone color I use is a non-photo blue, for reasons I’ll outline a bit later on. Instructions for this step below:

15_ChangingColorMode16_ChangingColorMode217_ChangingColorMode3

After this I divided the drawing in half, and printed both halves on separate 11 x 17” pieces of Bristol paper. These two prints are pieced together with archival tape on the backside, revealing the full non-photo blue print of the drawing, and also the start of the inking phase. 

18_Materials

Illustrator Henry Pitz wrote in his 1957 book Ink Drawing Techniques that “no medium reveals its deepest secrets except to those who love it”—a feeling that couldn’t resonate more with me. To me, drawing is the battle, and inking is reaping the spoils of war. I find a quality of expression in inking that is unsurpassed. It’s my favorite stage of the whole process, one that I find calms my mind and leaves me oddly meditative.  

19_FullInks

For these posters, the inking process took me about two and a half days of work. I prefer small brushes for the same reasons I work with mechanical pencils—they can get into tight corners and allow for a lot of detail-orientation and precision. When I ink something large like this, I tend to work in a rotating fashion, starting in a corner, inking a good chunk, and then spinning the paper around to work on another corner. The main purpose of this is to let the ink dry. It’s not uncommon for me to put my hand on wet ink, smudging a segment of the drawing, and rotating the canvas prevents that chance. Another concern I watch out for is prevents natural oils from getting on the paper. These natural oils will show up as fingerprints or palm prints in blacked out areas. It’s a small thing, but I try to prevent it to keep the illustration as pure and high contrast as possible.

Once the inking is completed, I scan it into my computer on grayscale mode at 600 dpi. This mode doesn’t pick up the non-photo blue and therefore the ink drawing is left isolated. The ink drawing is enlarged to print size, and coloring commences. With the amount of adjacent projects I had on the table, I chose to hire a colorist friend of mine, Meg Casey, to color flat the drawing: a process that includes blocking out the main shapes, coloring book style, within the drawing so that shading and color can be applied. Fortunately there was room in the budget for me to hire Meg, and it saved me a ton of time to work on other projects. When I received the flats back, they looked great.

20_MegsFlats

https://www.behance.net/megcasey

Finally, it was time to figure out coloring. The original sketch was a warm palette, with red, orange, and yellow, plus the white of the paper. After living with this combination for a couple days, I decided to reassess: I found it to be a bit of a strain on my eyes, and too close to my 2015 Phish poster palette as well. I wanted to mellow it down without sacrificing the psychedelic vibe that was achieved by three analogous hues. Intuition told me that a purple oriented palette was the right way to go, but it took me a few tries to get there. Remember, only 3-5 colors could be used since this would be screen printed. 

21_ColorAttempt122_ColorAttempt223_ColorAttempt3

The approved end result was 5 layers. The colors spanned from the deep, dark purple of the line work, to a sky blue that cuts through the purple like lightning. 

24_FinalResult25_FinalResult226_FinalResult3

Here’s how the isolated color palette looks.

27_FinalColorPalette

With the illustration completed, thus started a back and forth conversation with the very patient Half and Half printing. They received the final print file, and executed the necessary tweaks to get it ready for screen-printing before starting the process. A couple weeks later, the prints arrived, and the quality blew me away. Hats off to the wonderful people at Half and Half. They did impeccable work and I hope to collaborate with them again in the future. 

http://thehalfandhalf.com/printing/

The second to last step was to sign all of the posters. Vanity aside, this was no easy task with 1600 prints! Signing took me another three days, followed by packing the prints up again for transport. Luckily, the venue of the show was only an hours drive from my studio, so I was able to hand deliver the posters myself. 

So: one journey ends and many more await. Hopefully you enjoyed the ride, and gained some insight along the way. My process is personal and imperfect at times, but over my career I’ve learned to trust my instinct and do what works for me. Should you have any questions about any of these steps or my work, feel free to reach out at nolanillustration@gmail.com. 

Thanks to Rob for letting me take up valuable real estate on his blog. He’s a great artist, and a wonderful person. 

You can follow my work here:

Instagram: https://www.instagram.com/nolanillustration/

Twitter: https://twitter.com/conor_draws

Website: www.conornolan.com

Massive thanks to Conor for putting this post together for me to publish, I think he did an incredible job – of both the poster and the blog post. Conor’s work really is stunning, and he’s definitely an artist whose work I look out for on social media. Brilliant and inspirational. Do check out his links.

Thanks again Conor.

Guest post: Nick Stevens


This is the first of my guest blog posts, and my first guest author is Nick Stevens.

Nick is an Artist Member of the International Association of Astronomical Artists, and was on the board of the IAAA for several years. He specialises in realistic 3D rendered depictions of unflown space missions, and the space program of the Soviet Union.

You can find more of his work on his web site, and Nick is pretty prolific on Twitter too, where you can find him at @runnymonkey.

Now, over to Nick…


Computer Graphics for free.

There’s a general perception that computer based graphics is a highly expensive business.  And while it is true that the professionals use software with annual licence fees in the thousands of pounds, and high end graphics workstations, you can get very good results using cheap, or even free software. All you really need is a computer, (it does not have to be the latest and greatest), and time to invest in learning it. The second part is important! There’s a lot to learn, and whatever software you use, you won’t find a handy one click button, helpfully labelled “Instant Great Art”.

Types of software.

There are, broadly, several types of software, and I’ll cover those first.

The biggest division is between 2D, (like painting on paper), and 3D software, (making things you can view from any angle). 2D software can be divided into pixel based, (like your screen, essentially a mosaic with lots of tiny tiles), and vector software, where shapes are defined that can be scaled smoothly to the required size.

A good example of a pixel based image would be an icon. And a good example of a vector would be a typeface or font. (As with fonts, vector images are generally converted to pixel images at some point).

With 3D, I’d say the biggest divisions are between general software, (things like Maya, Lightwave 3D, 3D Studio Max) that try to cover all aspects of 3D graphics, and specialist systems that make it easy to do one thing very well, such as Daz Studio, (for characters), or Vue, (Terrains and landscapes). 

Whatever you go for you will find that your physical media art skills give you a head start, as you probably already have a good grasp of form and colour.

2D Vector Software – Inkscape

Inkscape is very highly regarded, 100% free, open source, and runs on Windows, Mac, and Linux.

inkscape.jpg

It does the same kind of thing as the (expensive) applications, Adobe Illustrator, Corel Draw, and Freehand – and it supports industry standard formats like .SVG, .PDF, .PNG, and .EPS.

2D Pixel Software – GIMP and Affinity Photo

Gimp stands for GNU Image Manipulation Program, again, it’s 100% free

gimp.jpg

Again it runs on Windows, Mac and Linux.

Its user interface can take a bit of getting used to, but it does have its strengths. It is perhaps the best at loading obscure and scientific image formats, for example, and is handy to have for those kinds of conversions. Also it now supports higher bit depth colour channels. (Don’t worry if you don’t understand that bit).

Lots of help and tutorials out there too, so Google is your friend!

If you do need something more capable, (and this is the only bit of commercial software I am going to recommend), take a look at Affinity Photo.  It’s insanely powerful, yet costs less than the “Lite” versions of the likes of Photoshop. It will even run on an iPad, and gives acceptable performance on my old iPad Air 2. Though I wouldn’t want to stitch together large panoramas with it.

affinity-1.jpg

2D Paint software, Krita

Krita, also available for Mac, Windows and Linux is painting software, and is 100% free and open source.

krita.jpg

This means that unlike image processing software, (Photoshop, GIMP), it focuses on emulating traditional tools, with the advantages of digital such as undo, and layers.  So it will let you work with the digital equivalent of a marker pen, watercolours, or oil paints, reacting to existing elements in a similar way. It works well with Wacom tablets.

General 3D Software: Blender 3D

Blender is a powerful general purpose 3D program, 100% free and again available for Windows, Mac, and Linux. It has some advanced features like a hair and fur system, and fluid simulation. Like any 3D software, it is complex and will take some learning, but it has perhaps the most actively supportive community of any software. So support is second to none while you are learning.

blender.jpgThere are entire short films where you can download all the assets, (files, images, models and scenes), to examine. This includes the Pixar style “Big Buck Bunny”, which you can watch here.

If hard science is more your thing, NASA provide plenty of 3D models in Blender 3D format, ready for you to use. You can download them here.

Sculpting software – Sculptris

From the makers of ZBrush, Sculptris is free sculpting software, (Windows and Mac, not Linux).

sculptris.jpg
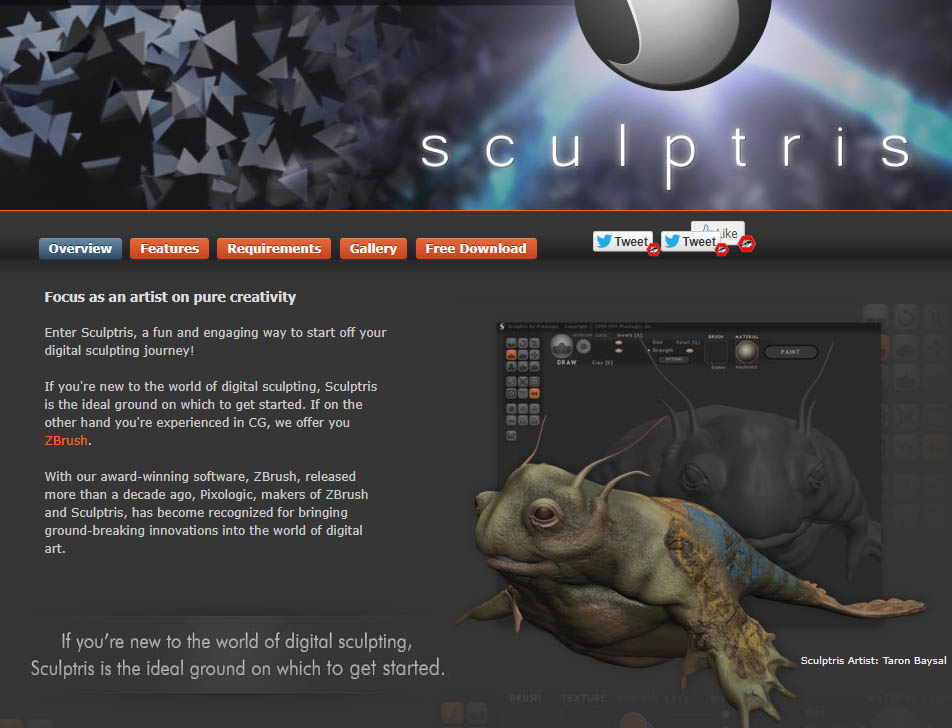
It’s important to note it is no longer being developed, but even so, pretty good for free. Most 3D software is based on placing points and polygons; sculpting software emulates sculpting with materials, in much the same way that painting programs emulate brushes and paints.

Everything at once!

If you have a somewhat old laptop or desktop, you might want to consider turning it into a Linux system. This will take a bit of getting used to if you normally work on Windows or Mac, but it is very efficient, and will perform much better than it would under Windows or Mac. Every time I boot into Linux it feels like I’ve just had a hardware upgrade.

I’m recommending a particular flavour of Linux, called UBUNTU STUDIO.

ubuntu.jpg

It’s a special version of the popular Ubuntu Linux, aimed at creatives. And after installing it on your computer you will find that it comes with a whole mass of graphical tools already installed and configured. And audio tools, video tools, photography tools, and publishing tools. These include Blender, GIMP, and Inkscape.

You can also install it alongside your existing operating system, but that’s outside the scope of this blog post.

While not all the tools included are best in class, (or anything like it), there’s a solid core of extremely useful and powerful software here. And as I said, it will run well even on older hardware.

You can also try before you install, setting up Ubuntu Studio to boot from a USB stick. Instructions are here.

Conclusion:

Time, dedication, and talent are much more important than money if you want to get into computer based art. Software will not magically make you an artist, but it will give you the tools you need to become one, even if all you have is an old desktop PC and monitor gathering dust.

leonov-on-moon

For more stuff from me, please visit: www.nick-stevens.com

Thank You! 

Nick


Huge thanks to Nick for taking the time to put together this very handy blog post, which I’m sure will be useful for a lot of people wanting to get in to computer arts. Do check out Nick’s website – there really is a huge amount of wonderful work there, and give him a follow on Twitter.

I’ll have another guest blog post coming up soon.