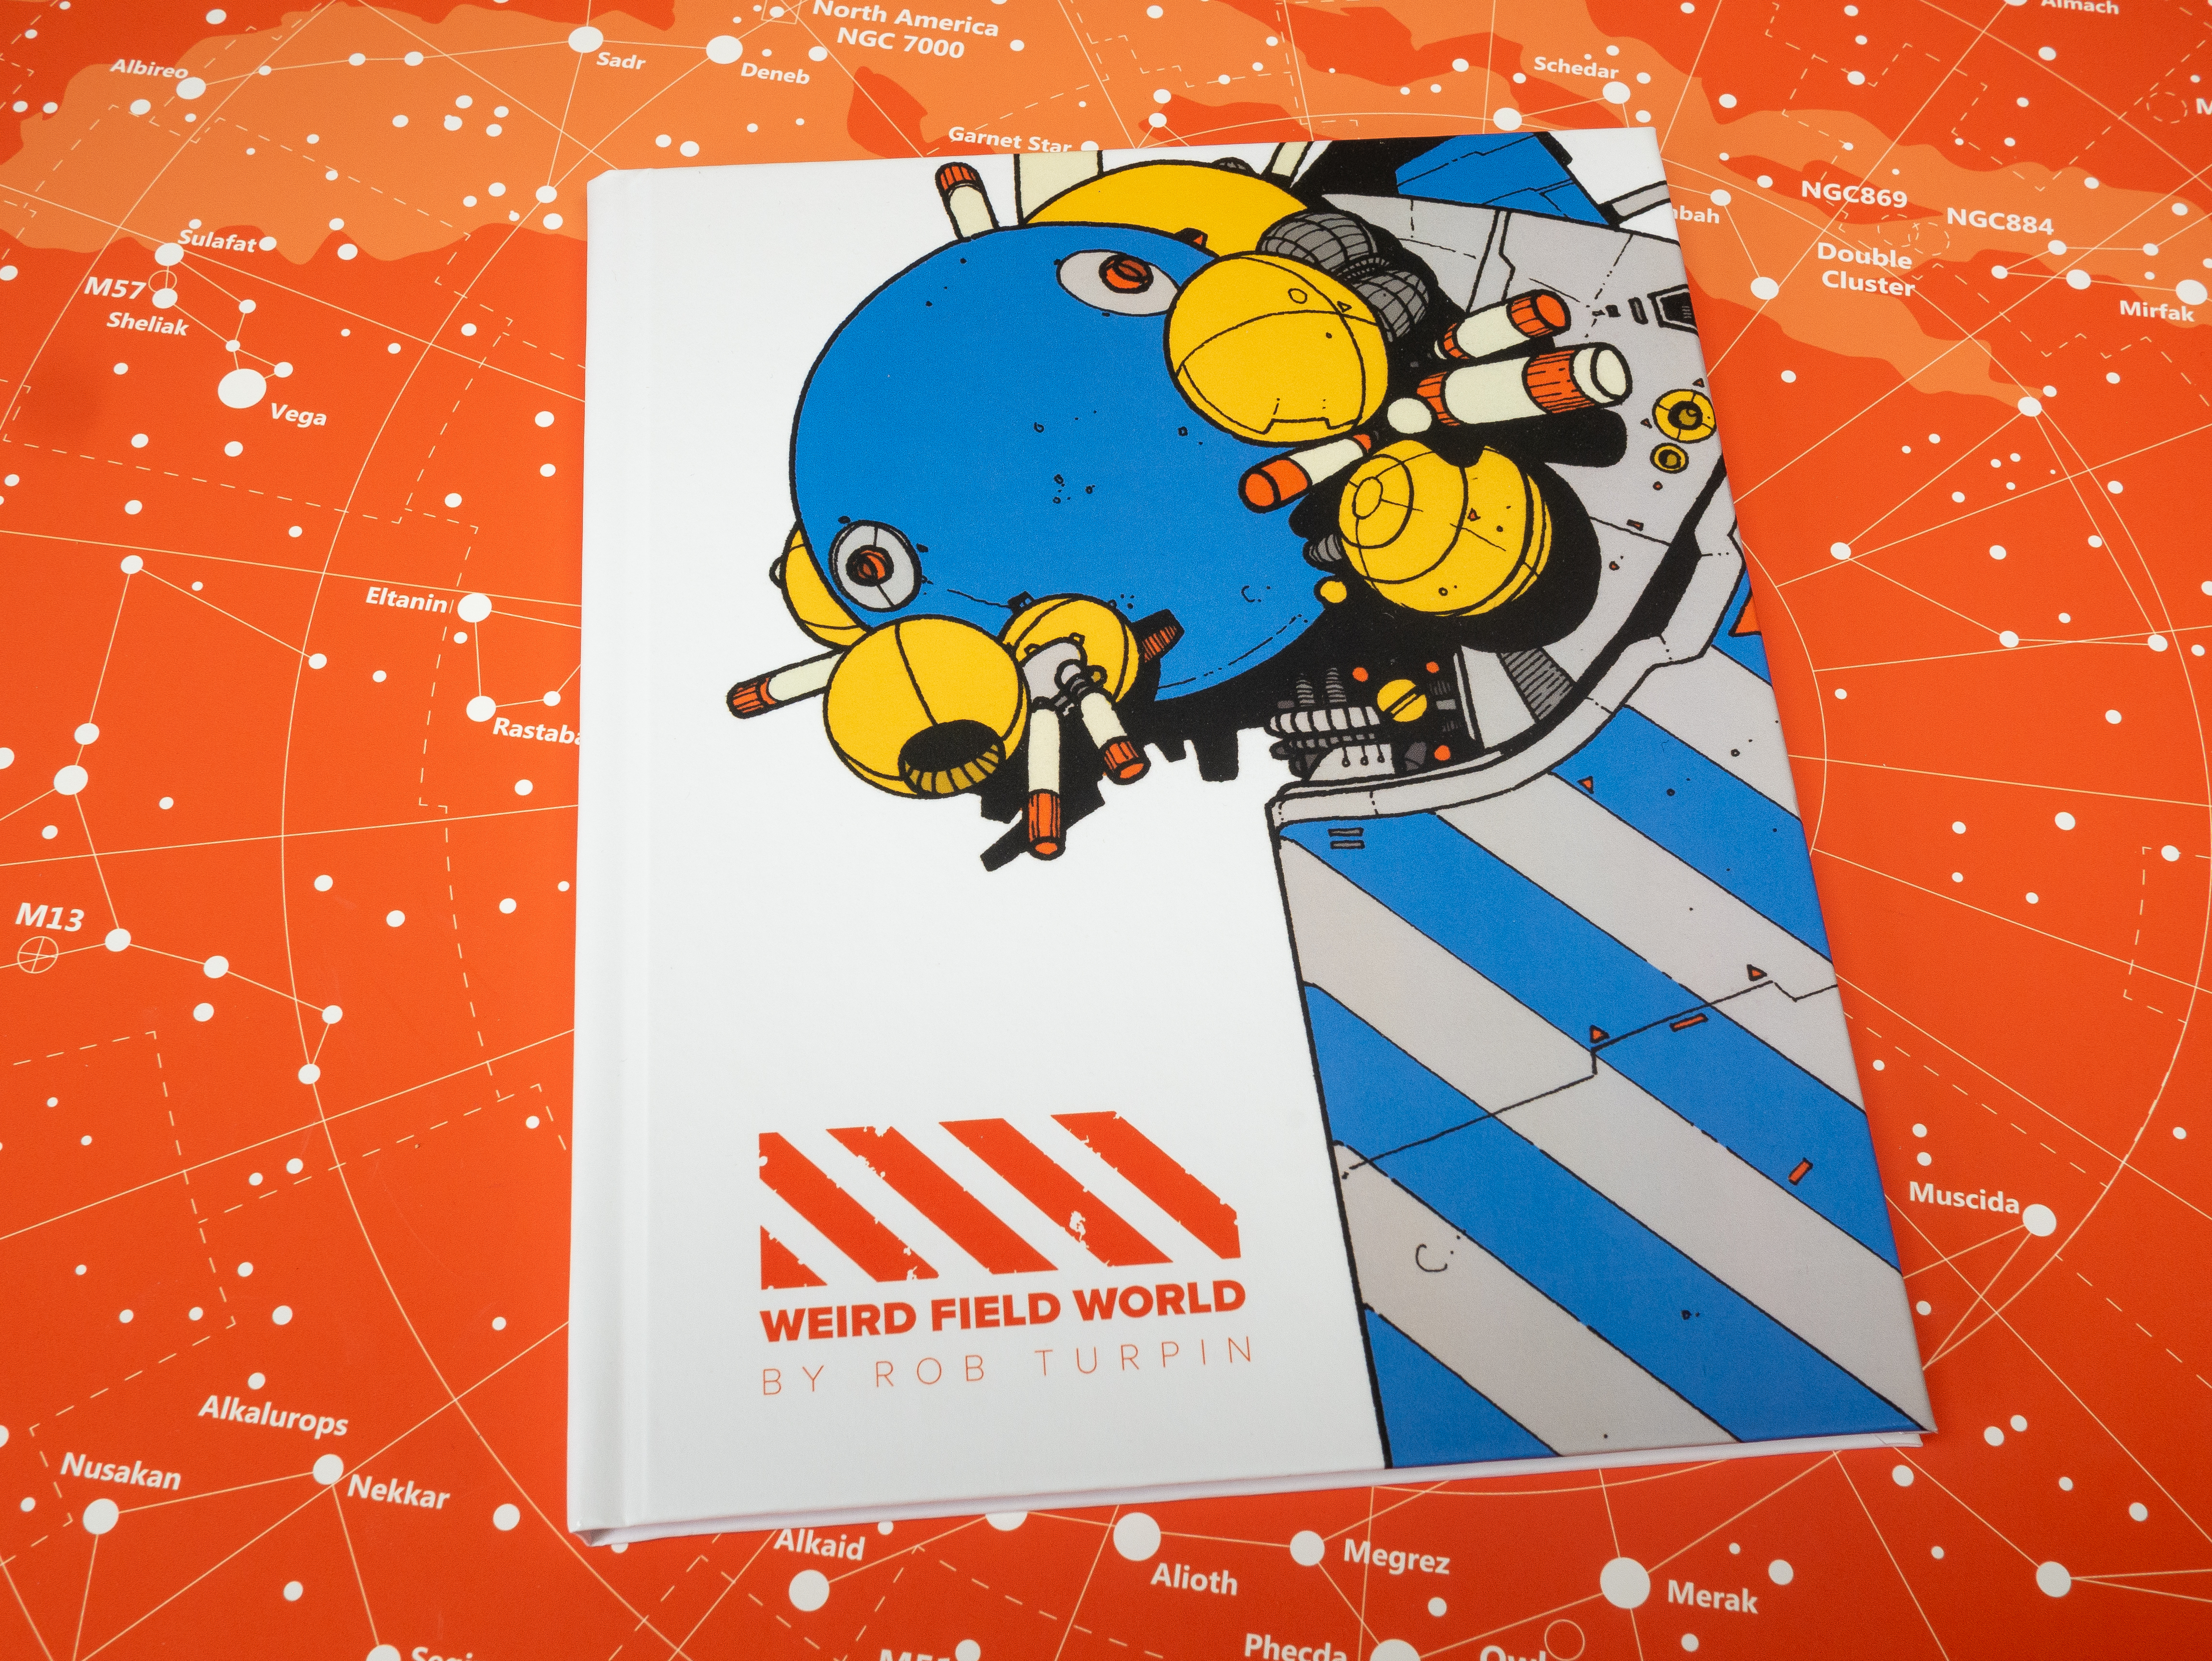
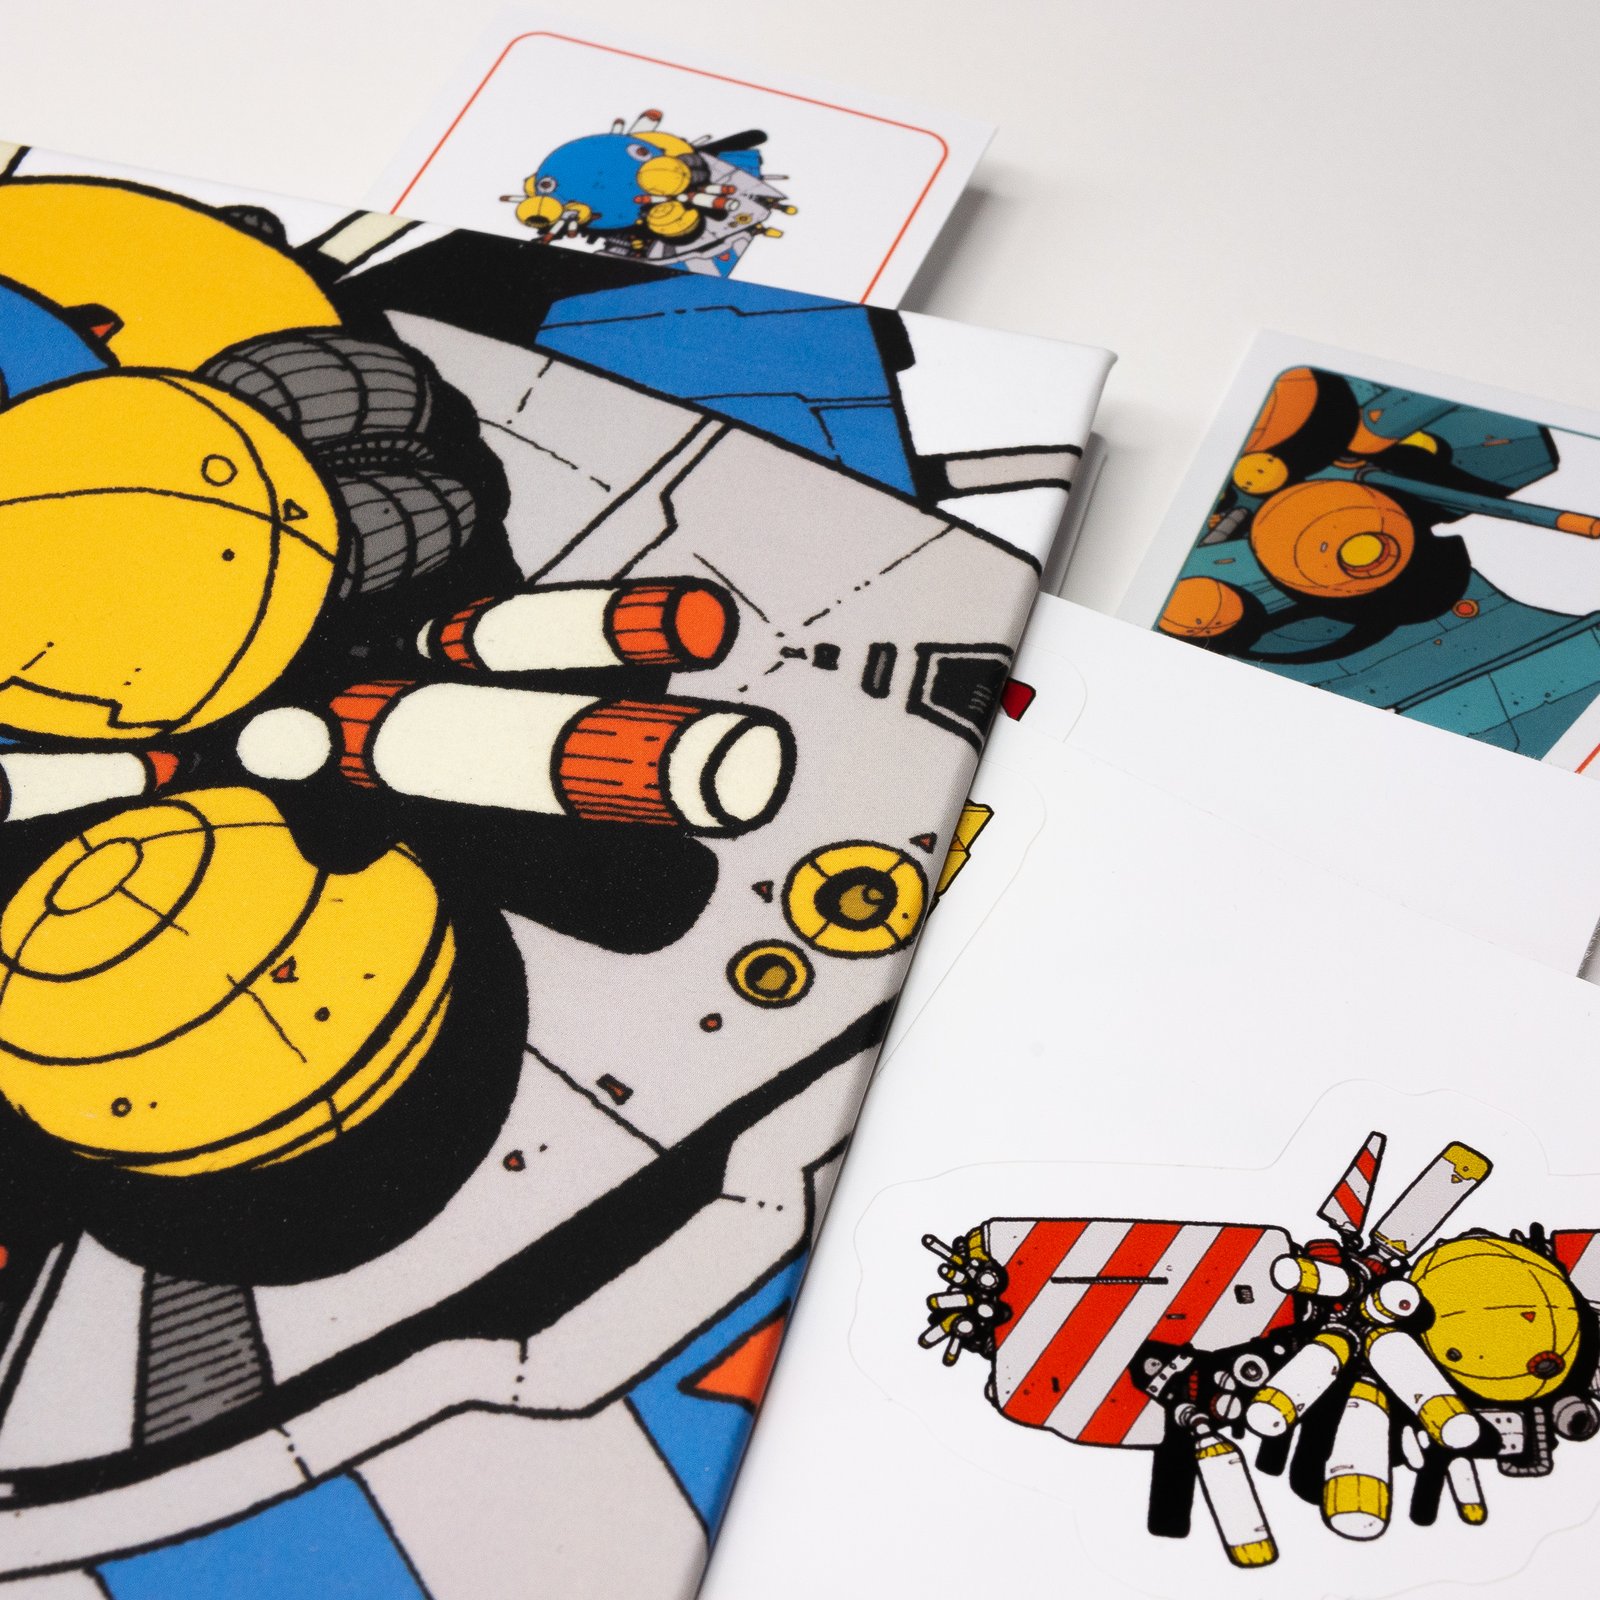
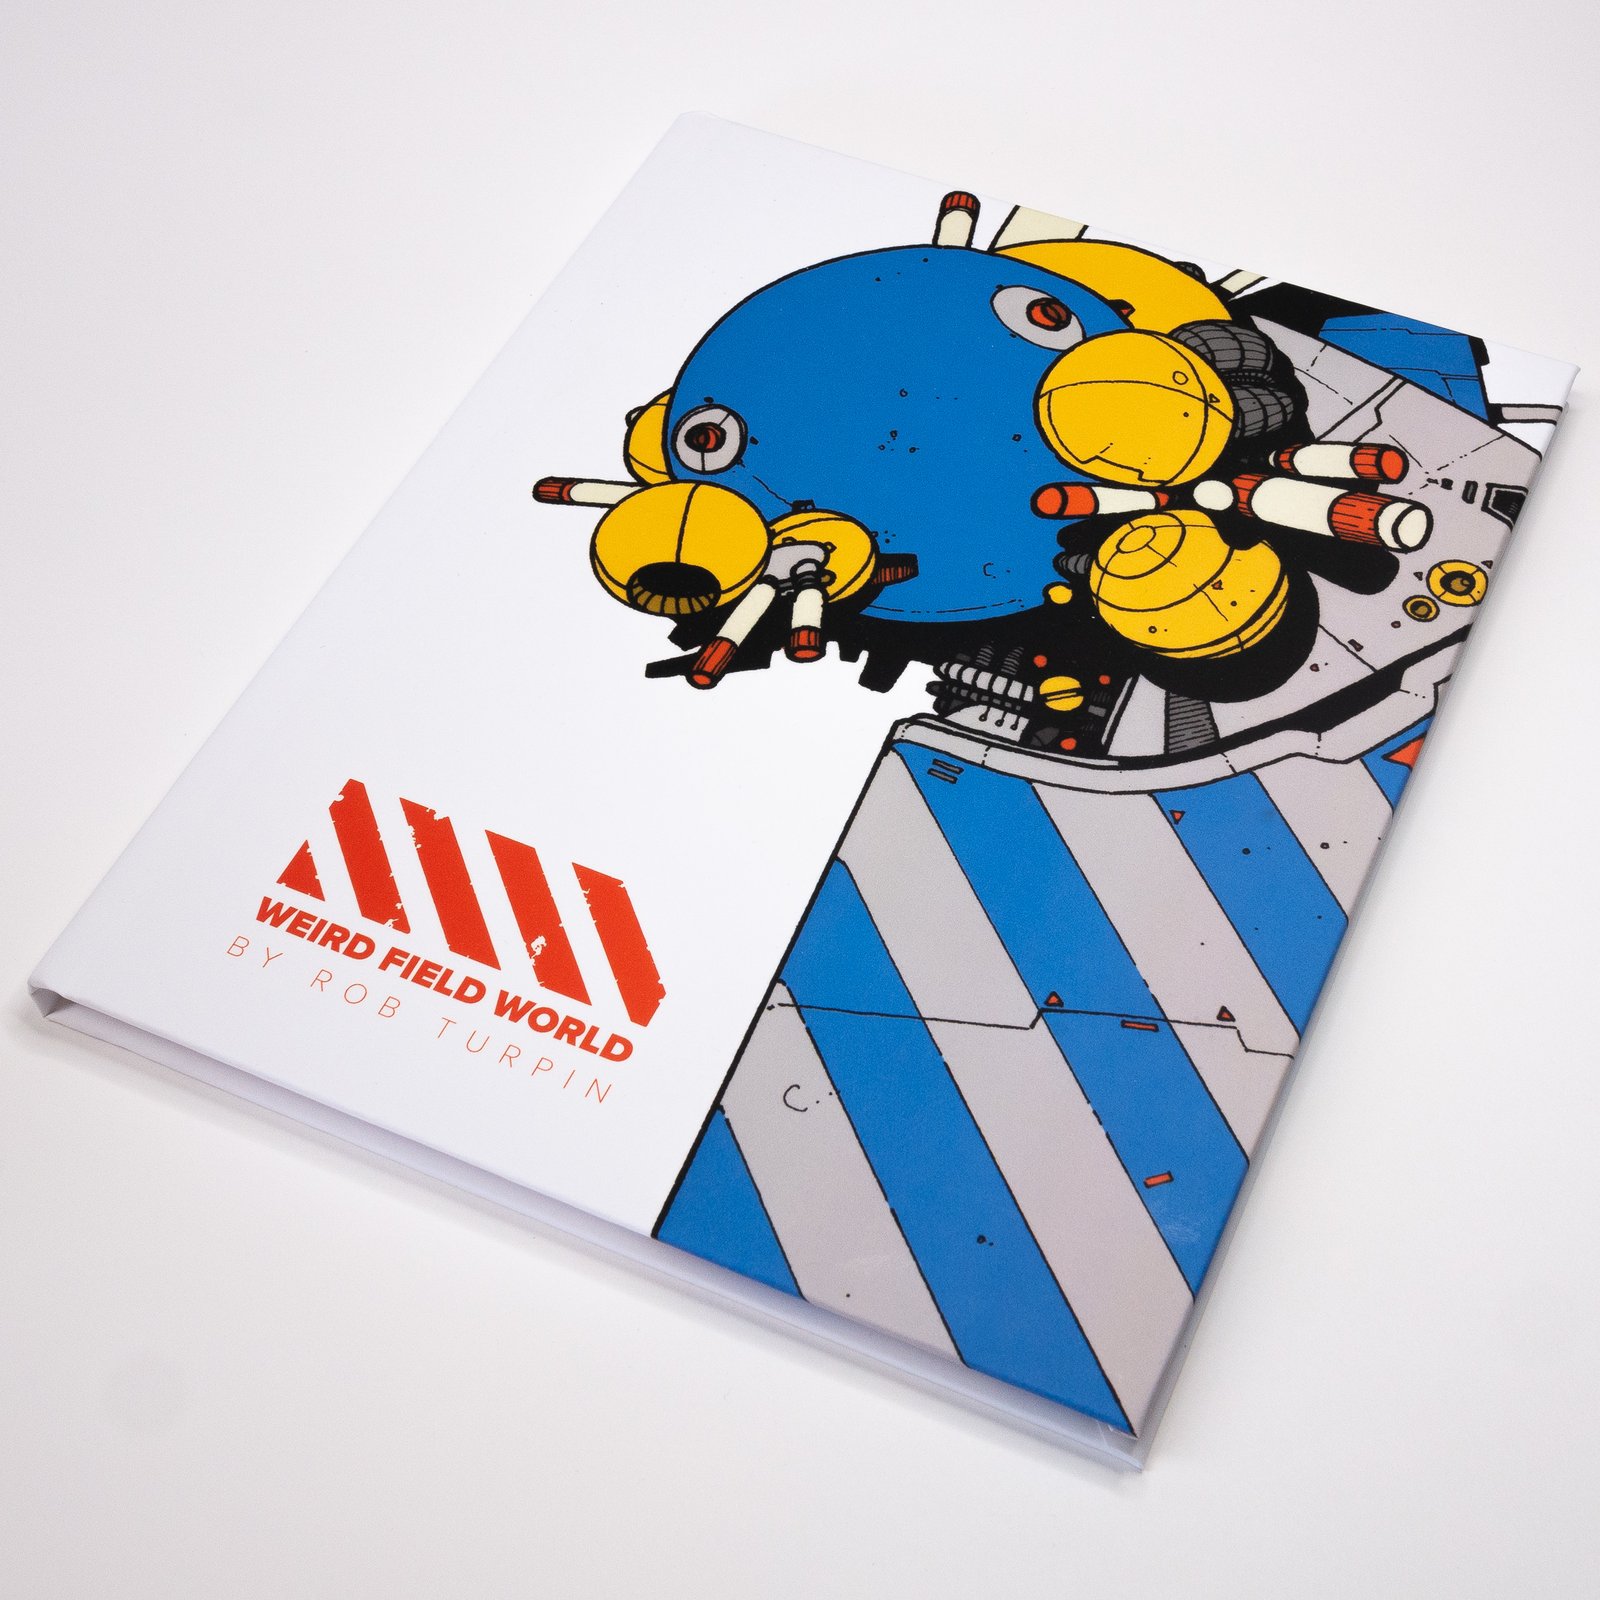
My first book, Weird Field World, is now available to buy here. If you’re a regular reader of the blog you’ll know that I ran a successful Kickstarter campaign to fund the book, and now all of the backers’ rewards have been mailed, the book is available to the general public.
The Weird Field World is a project I’ve been working on for around three years. It started off as a couple of little doodles on scrap paper, as I wondered what a spaceship might look like if it had an entirely novel form of propulsion. I figured it might look a little weird, and that name kind of stuck.
I built the project and produced content for it over on Patreon. The income from my supporters there allowing me some time to develop ideas, to write, and to draw lots of spaceships. What I’ve ended up with is a book full of spaceship illustrations, character drawings, written fiction, maps, diagrams, and a lot of world-building. I’m very proud of it, and the feedback so far has been fantastic.
If you’d like a copy, click here to buy one from my shop.
This is the second of my guest blog posts, and my guest author today is Alastair Temple.
From Alastair’s website –
Alastair is a professional engineer who has been known to dabble in Digital Art and Photography. He is a founding member and administrator of the international art collective The Luminarium.Alastair has worked with a number of clients worldwide ranging from bands and artists such as Delta Mainline and Jonathan Kreisberg to publishers such as HarperCollins.Alastair is from Scotland and is currently based in Malmö, Sweden.
This blog post has taken me quite a long time to write (we are coming up for about 10 months now), partly because I am very good at putting things off and partly because I really wasn’t sure what to write about. When I initially put myself forward for doing this I had suggested that I put together a walkthrough for my piece Going Home, but the more I thought about it, the more it seemed relatively uninteresting (for those that do want it, I have included a quick overview at the end).
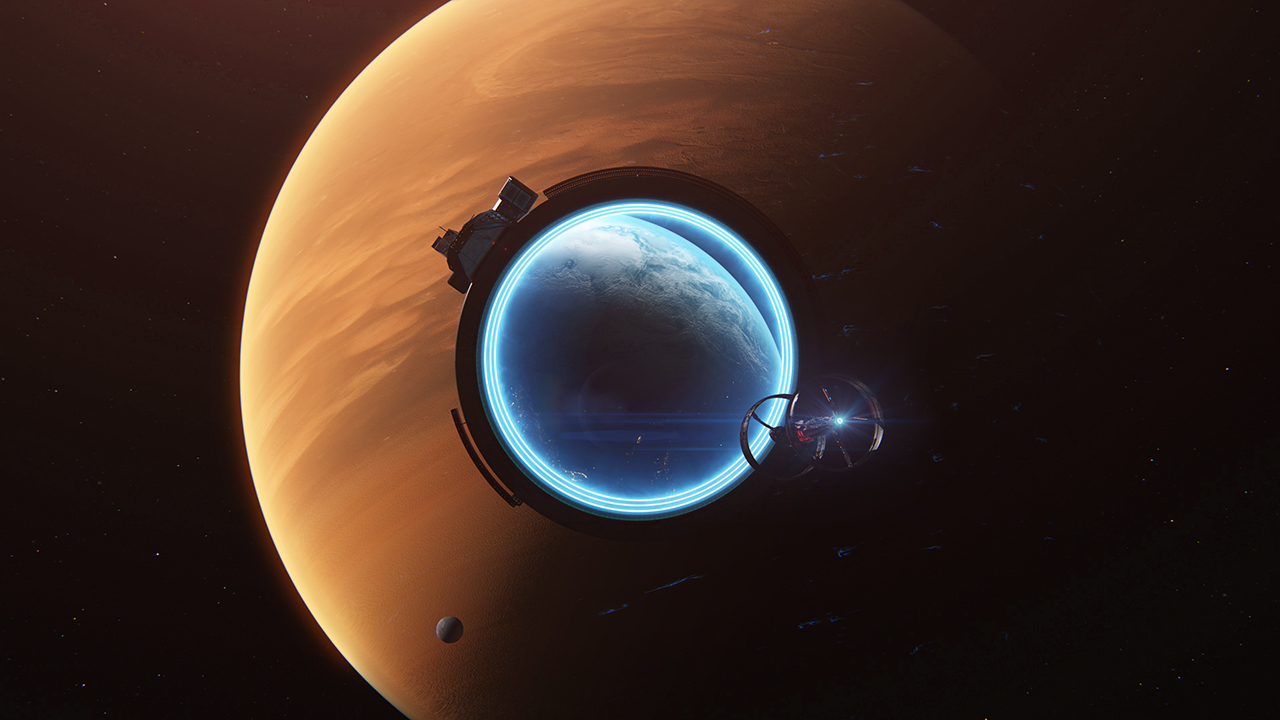
Going Home
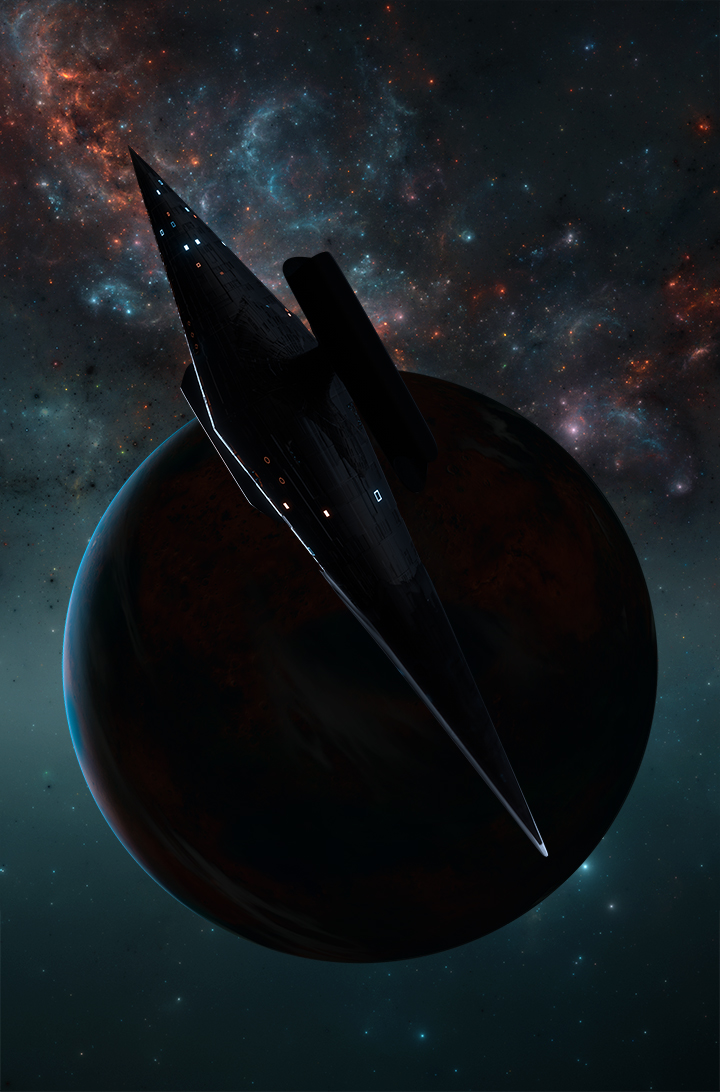
It was only after making a more recent piece, my Lighthugger illustration, and how well received it was that I thought of something which will hopefully be more interesting. I realised what I had done well in these pieces, and it is consistent if you look back through my portfolio (for example my first ‘successful’ scifi piece The Guardians has similar features) it is that I hide the lack of details, and hint at them rather than showing them.
Lighthugger
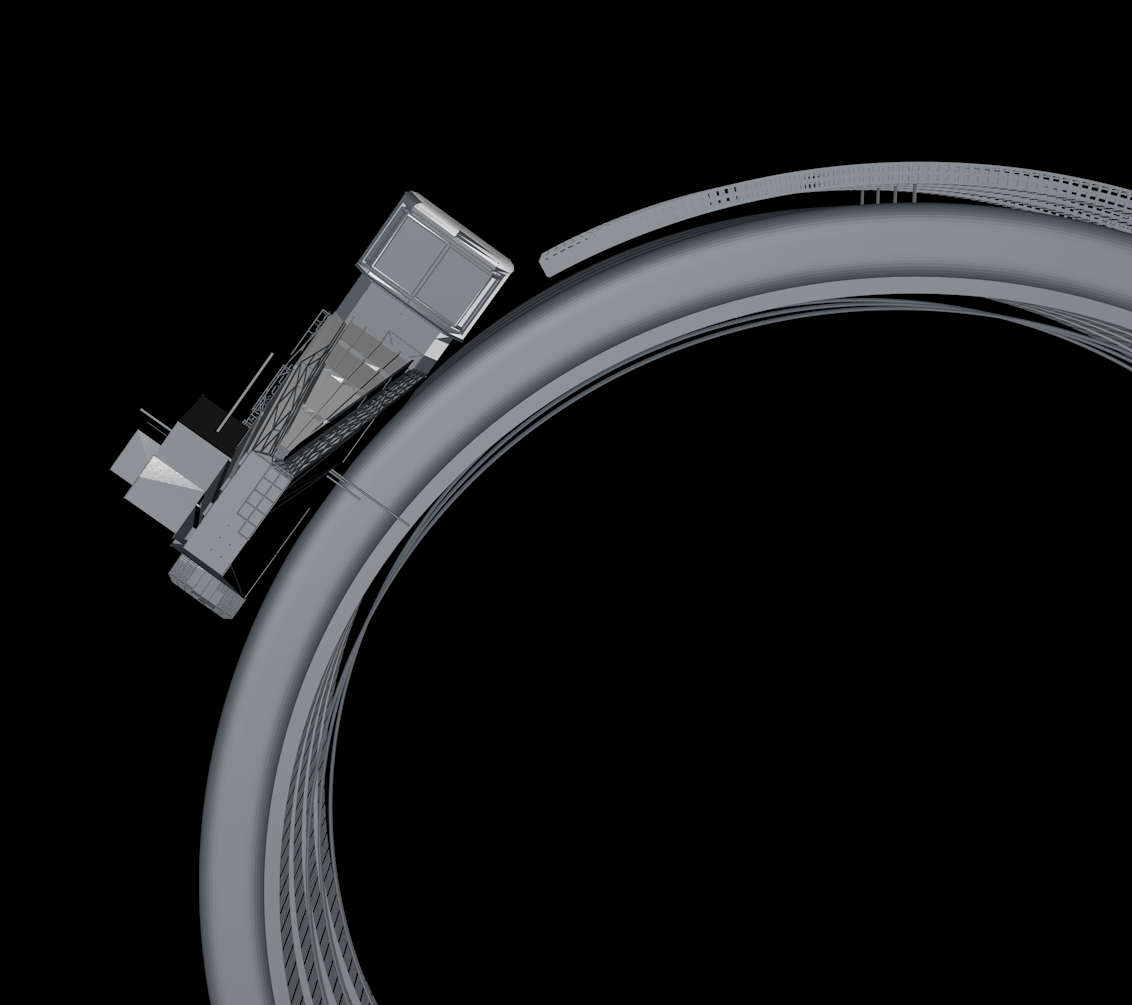
This is even clearer when we look at some of the actual models for example those of the jump gate/portal from Going Home. To put it simply I am not a very good modeller, and I can’t paint, so I have needed to come up with some strategies to hide these facts while I slowly improve them. It is these that I will share with you today, and hopefully they will help someone else out there as well.
The Guardians
Model close/ups (lighting and textures removed):
Model Close UpModel Close Up
Strategy Number 1 – Scale is your friend The first and simplest way to reduce the detail needed is to make use of large scale scenes. When things are a long distance from the observer, you simply can’t see as much. For example in Going Home I didn’t need to worry about if the windows looked real or the structure made sense because you can’t see it. Scale allows you to think about general proportions of the object and how it fits into your composition while not having to worry about all the little details that make an object look real when close up.
Strategy Number 2 – Utilising Lighting. The second strategy is to use lighting to hide or obscure areas and therefore minimise the detailing required. Here backlighting (or side lighting) is your friend. These types of lighting are dramatic to start with which is a definite bonus, but also they highlight the overall shapes of your objects, the shape of any key components and to use textures to hint at smaller details. If we take for example my Lighthugger piece, the use of backlighting, and the nebula behind the ship allows me to define the conical shape of the ship, highlight the two outboard ‘conjoiner drives’ and the ice shield on the front. I can use textures/displacement maps to hint at panelling and other details on the rest of the ship as well as adding some lights to give an impression of windows/exhaust vents/hangar bays etc, without having to worry about if the actual details make any sense. If we take the same model and piece, and reverse the lighting so it is front lit, then you can quickly see it looks like the simple model it is and there aren’t any real details to speak of.
Lighthugger – final with backlightingLighthugger – lit from front
Strategy Number 3 – Use Assets (by others and yourself) This is a fairly simple and straightforward point. You don’t have to create everything from scratch for every piece. In all of the pieces I have talked about today I have re-used things I created for other projects, I have kitbashed from my own assets and kitbash packs (there are a lot of good free ones out there if you don’t have the budget to pay), I have used textures made by others and I have used generative programs to create things in ways I would not be able to myself.
For example in The Guardians we have:
The large structure I created in Mandulbulb3D, just messing with parameters until I had something I liked.
The lens flare was created by my friend Bobby Myers for me to use for the project.
In Going Home:
The ship was kitbashed,
The planets were both created using Video Co-pilots orb plugin (and the base texture for the gas giant was an acrylic paint texture by Julian Frener).
The engine lens flare is from a pack I bought a while back.
In Lighthugger:
The ship utilises textures by Travis Davies and some created in JSPlacement.
The background nebula is created through a number of fractals made in Apophysis.
So I guess what I am saying is, don’t let your lack of skills in certain technical aspects stop you. Work on them definitely, but in the meantime, minimise their impact on your final piece by starting simple. Concentrate on getting the composition, colours and feel right and try and do a little more each time!
That walkthrough overview for those who are interested:
Model jump-gate in favoured 3D software (I used Cinema4D, but 3DsMax, Blender or any other could easily achieve the same results).
Model or kitbash a spaceship design also in 3D. Include both in the same model so they are lit the same, but render separately to ease composition later.
Make 2 planets, I utilised Video co-pilot’s Orb plugin for After Effects for this and utilised an acrylic paint texture for the gas planet.
Composite in photoshop (note for a central composition like this, you want everything to be almost, but not quite symmetrical).
Add lighting effects, lens flares etc and do final colour corrections.
Save and upload.
Huge thanks to Alastair for putting this blog post together. As someone who is just starting to learn 3D there’s a lot of great advice here. Hope you’ve enjoyed reading this as much as I have. Do check out Alastair’s links, website and social media.